
Claude Desktop
在 Windows 或 macOS 的 Claude Desktop 中,通过第三方推理网关接入 AsterFlow。
适用范围
本教程配置的是 Claude Desktop 的第三方推理网关。配置生效后,Claude Desktop 会把推理请求发送到 AsterFlow;这不是只针对单个 Code 会话的设置。
Windows 桌面端图文指引
1. 安装 Claude 桌面版
打开 Claude 官方页面,点击 Download desktop app,下载并安装 Windows 版本。
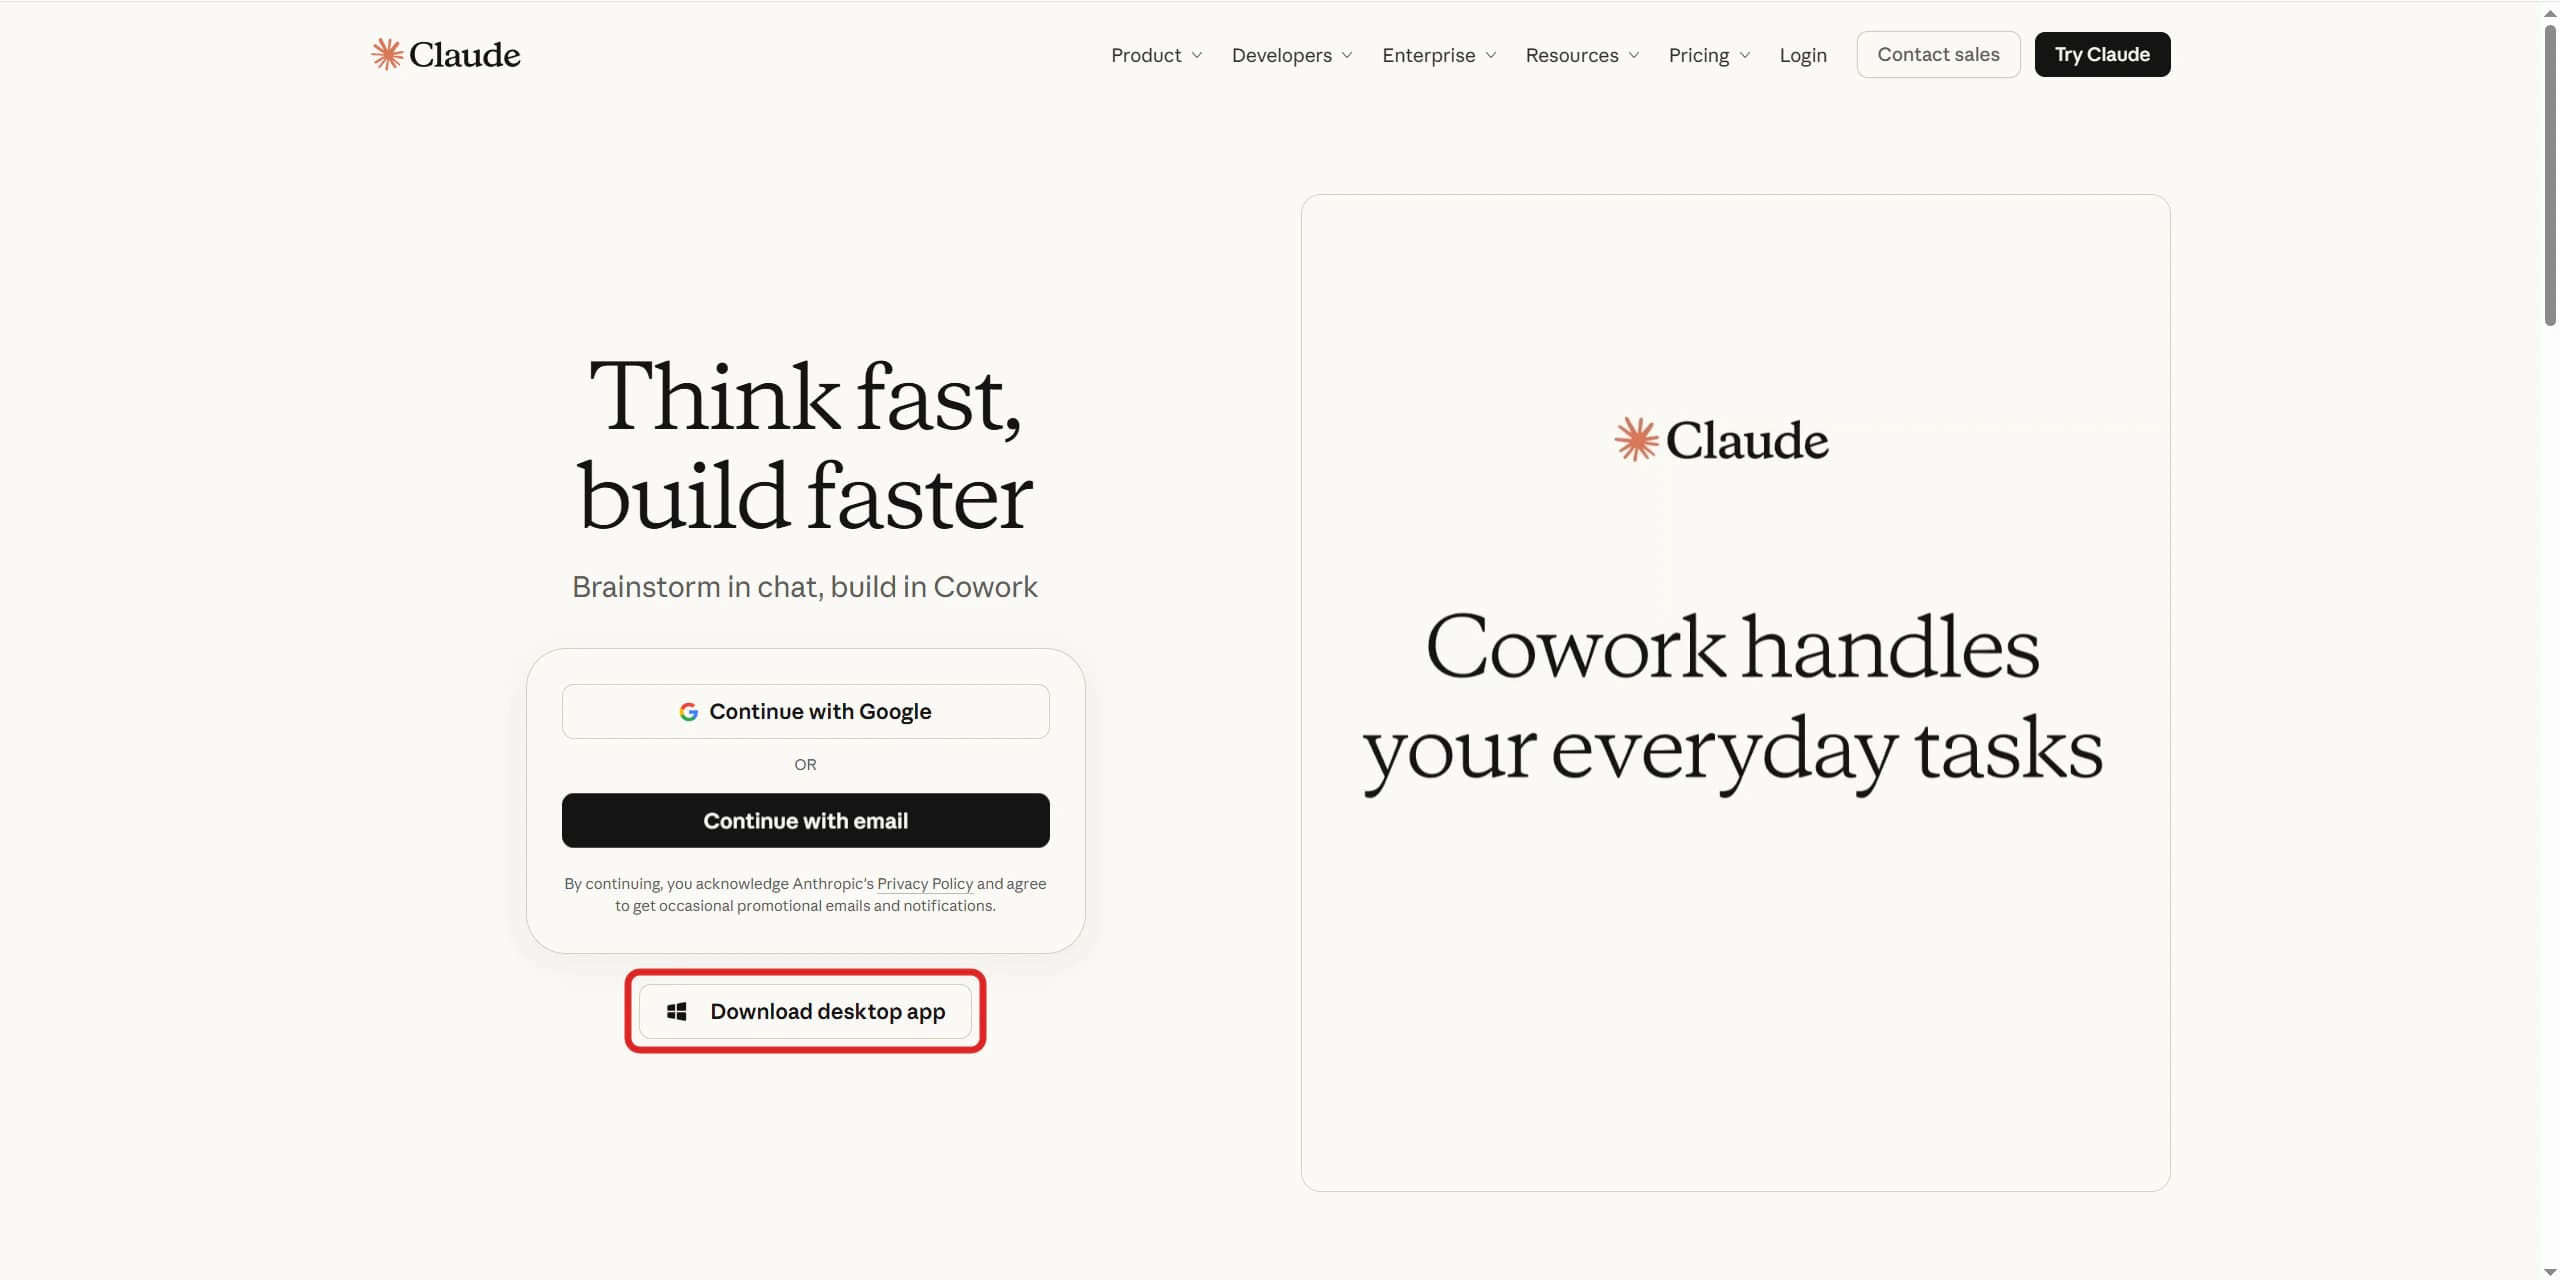
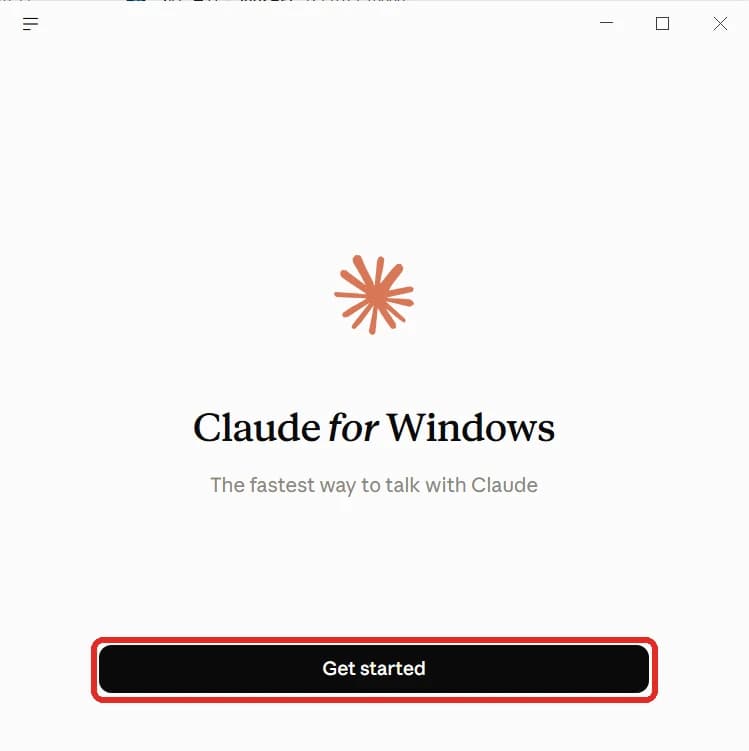
安装完成后打开 Claude Desktop,点击 Get started。
2. 获取 AsterFlow 密钥
打开 AsterFlow 令牌页面,创建或复制一个可用的 API Key。
3. 打开第三方推理设置
- 打开 Claude Desktop,点击左上角的菜单按钮
☰。 - 如果菜单中已经有 Developer,直接进入第 4 步。
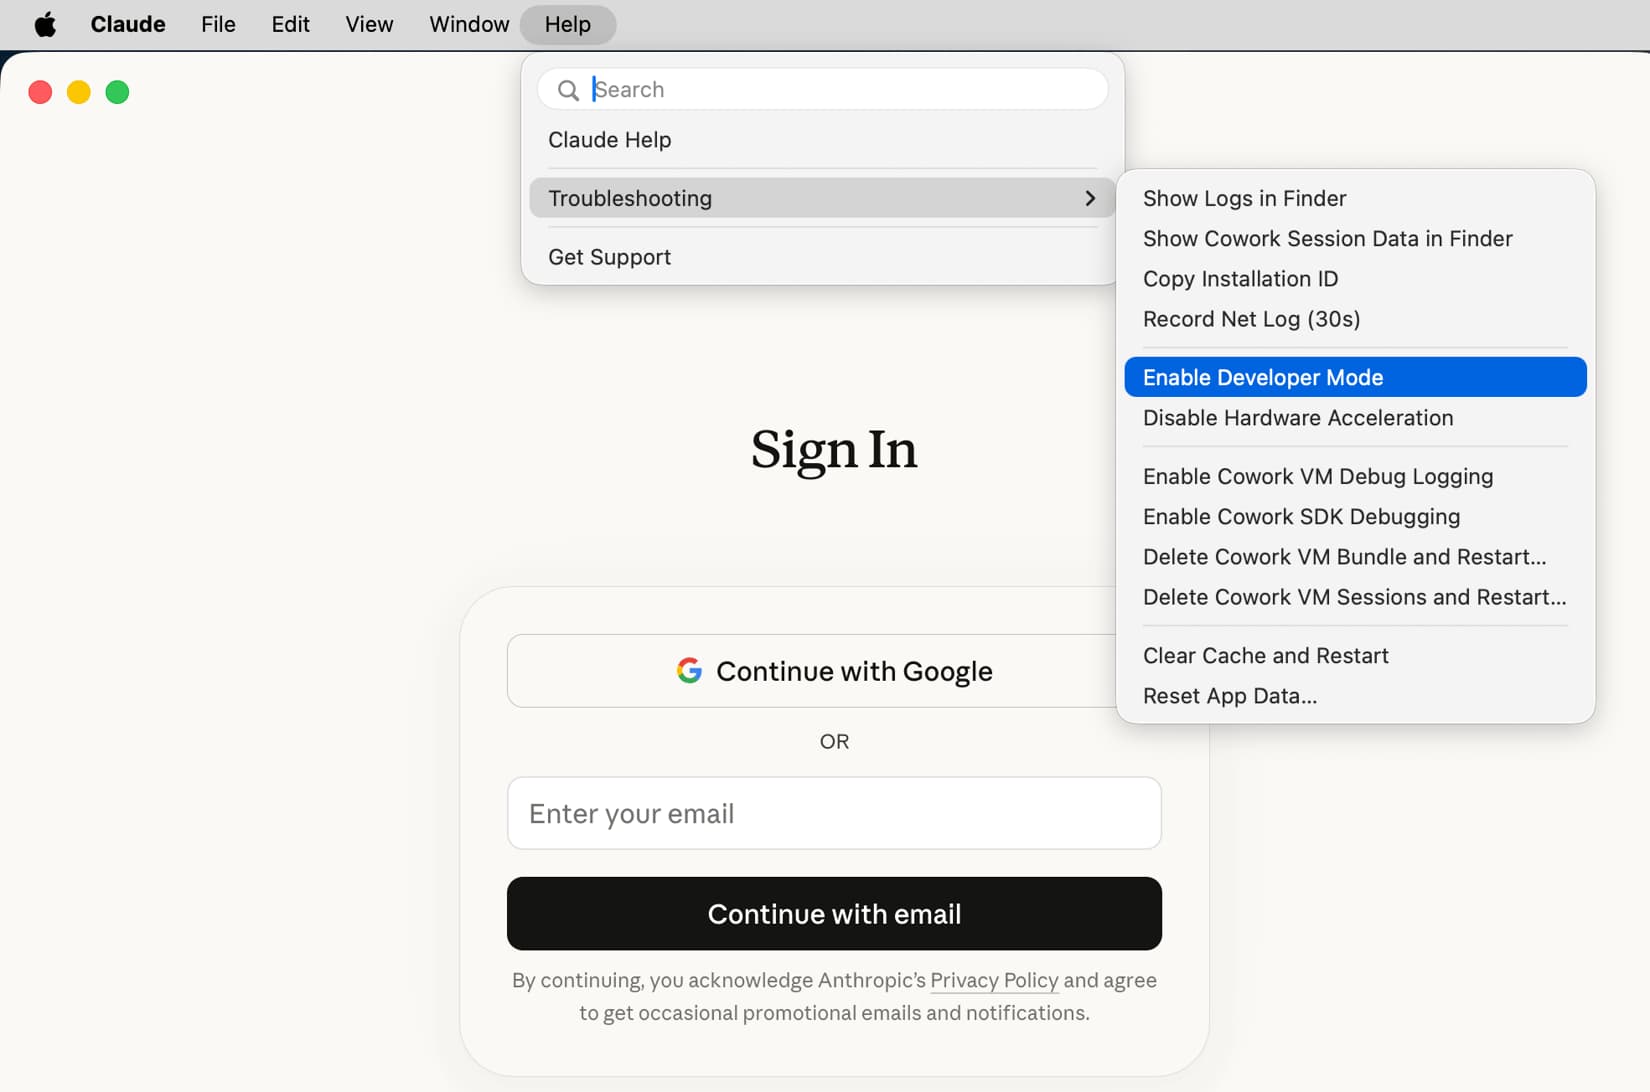
- 如果看不到 Developer,进入 Help → Troubleshooting → Enable Developer Mode...。
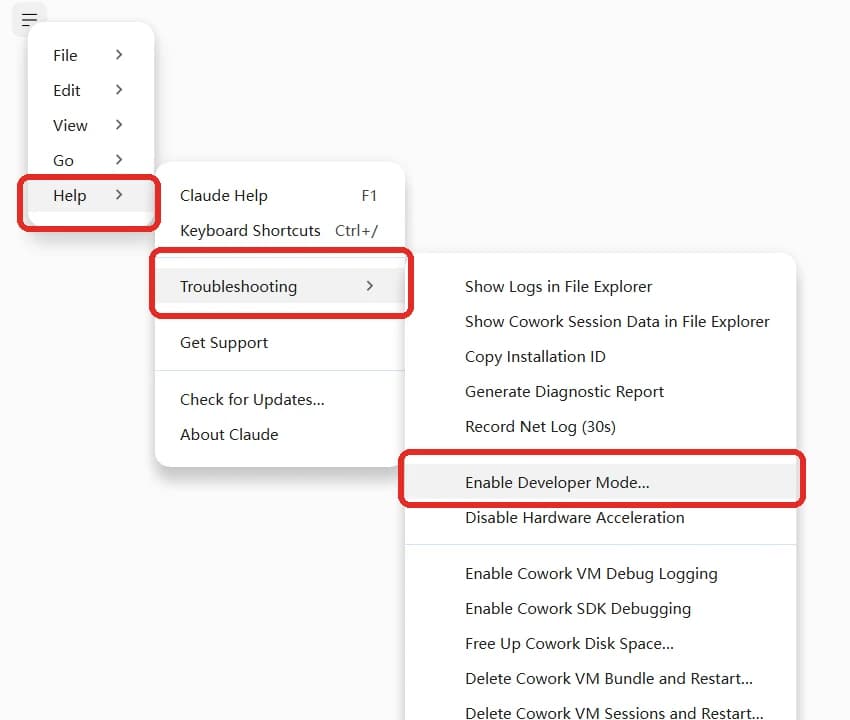
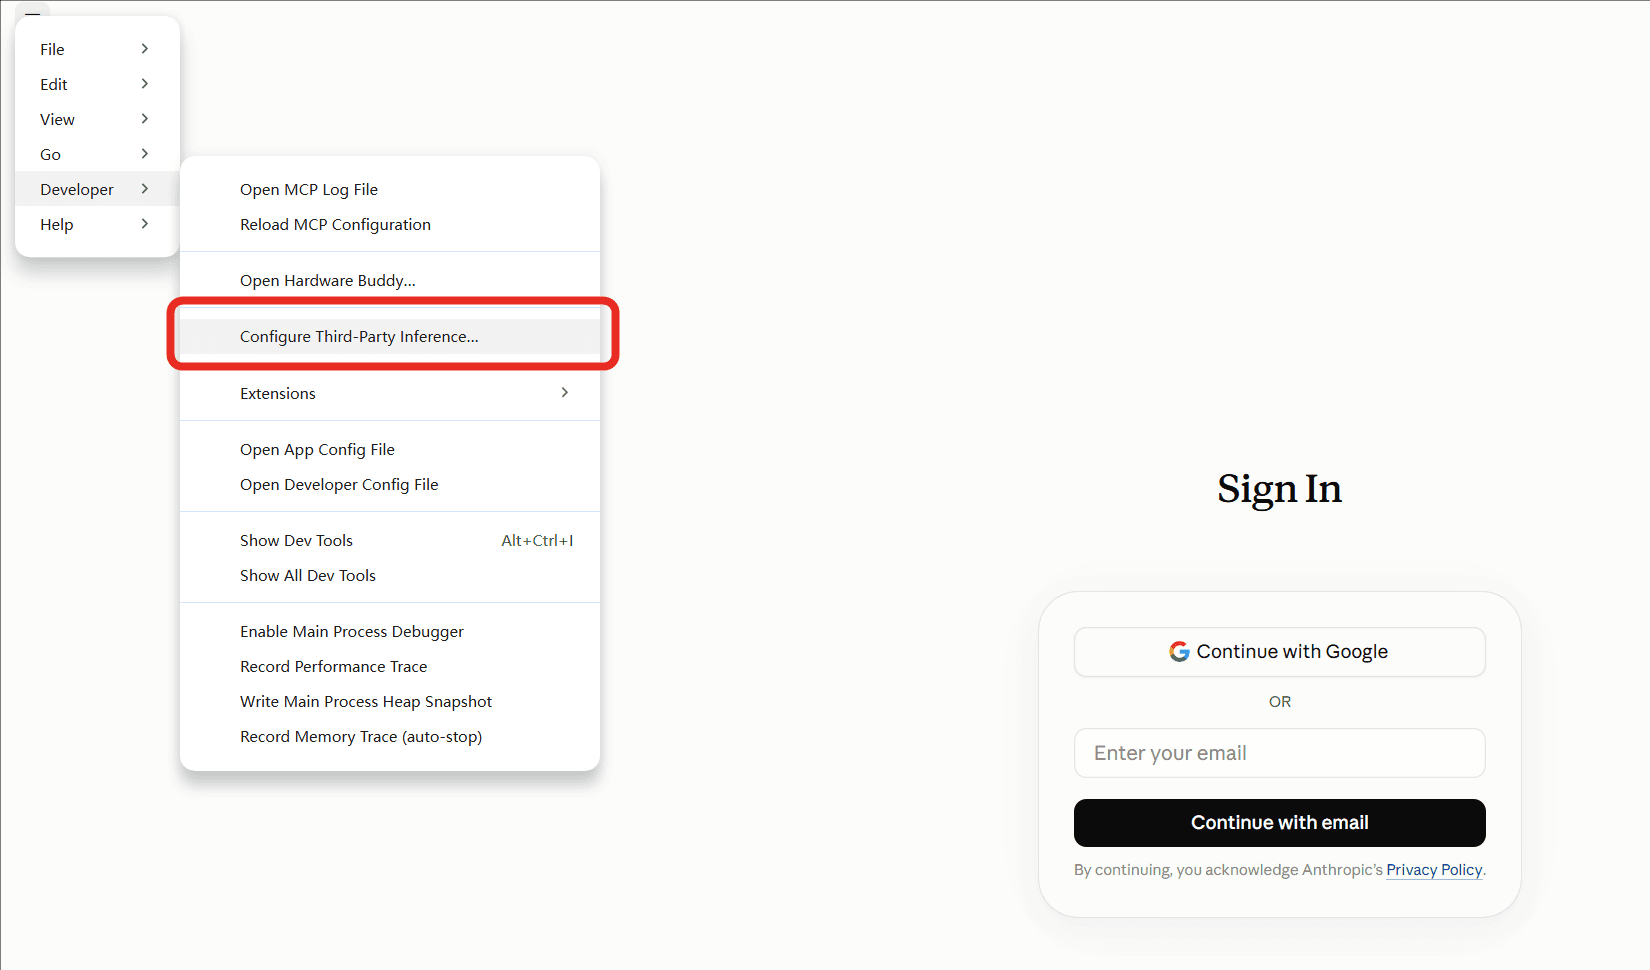
Claude 重启后,再次打开左上角菜单。
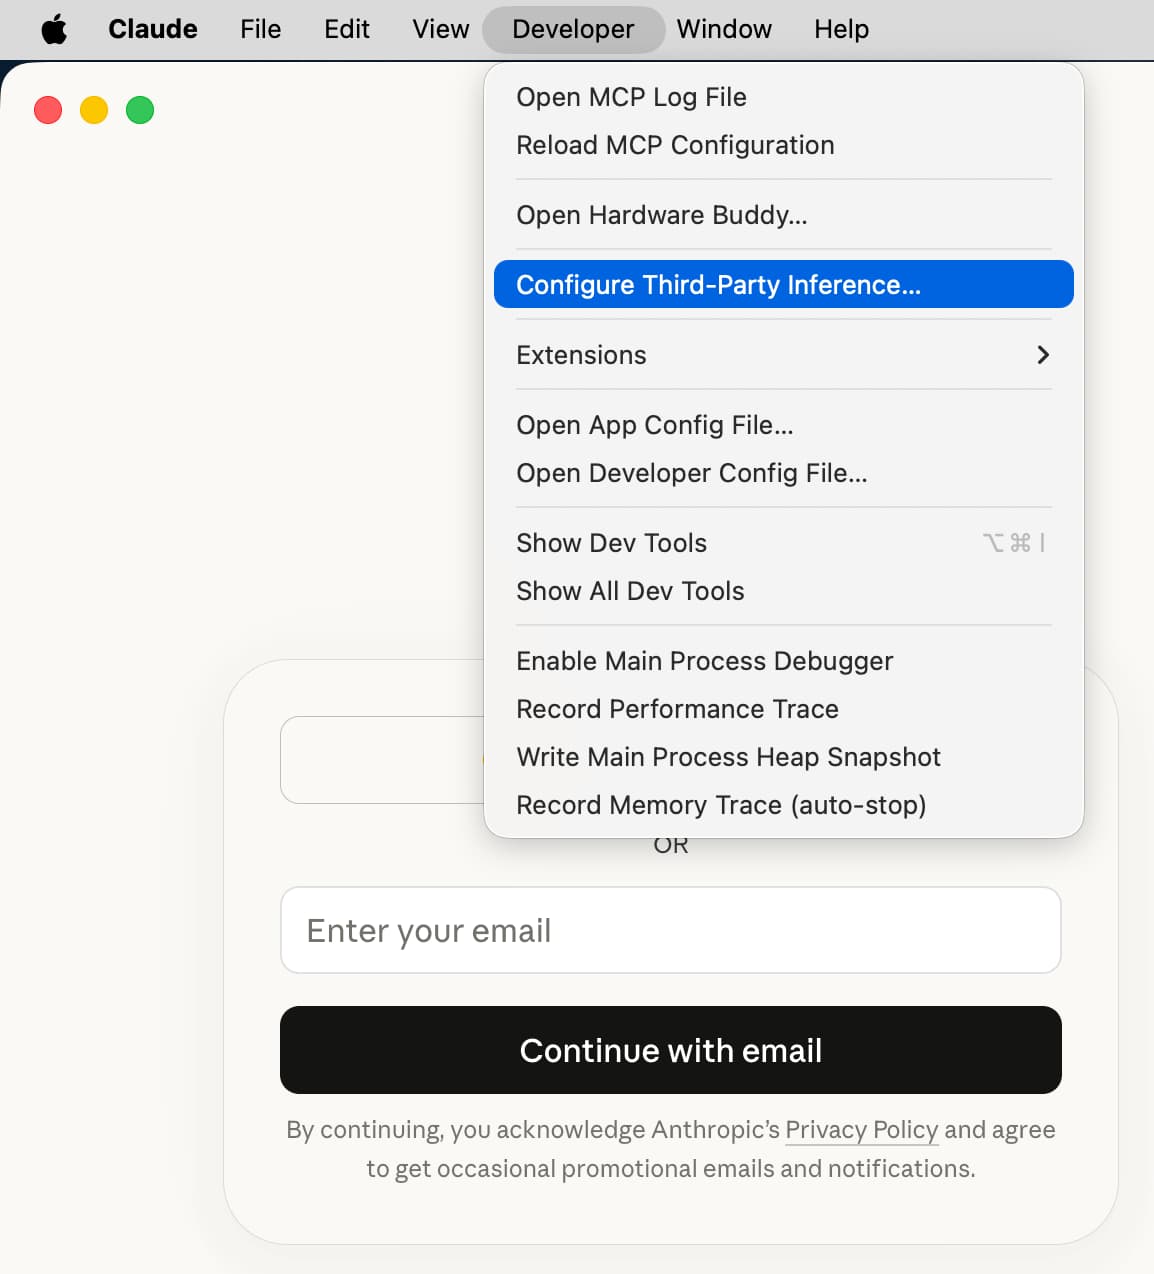
- 进入 Developer → Configure Third-Party Inference...。
4. 填写 AsterFlow 配置
在 Connection 页面填写以下内容:
| 配置项 | 填写内容 |
|---|---|
| Connection / Inference provider | Gateway |
| Credential kind | Static API key |
| Gateway base URL | https://asterflow.ai |
| Gateway API key | 粘贴你的 AsterFlow API Key |
| Gateway auth scheme | bearer |
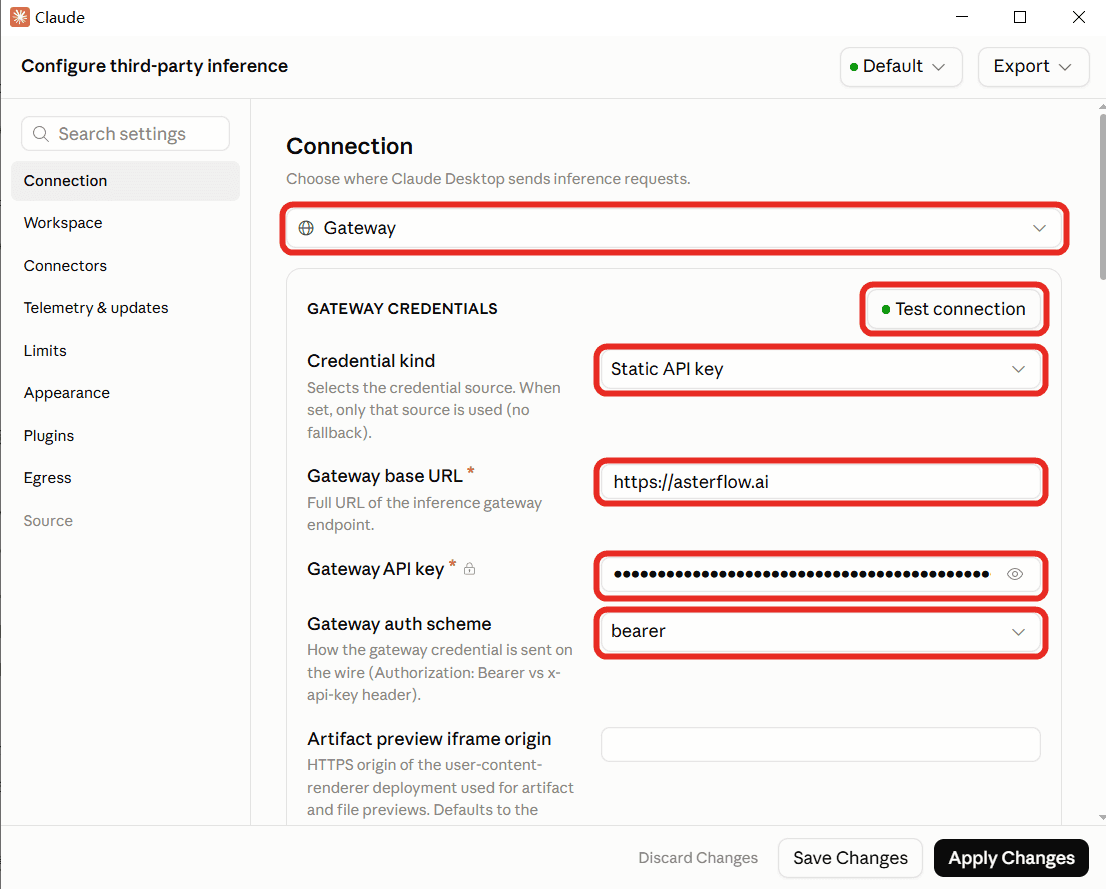
填写完成后,先点击 Test connection。显示连接测试通过后,点击 Apply Changes,再按提示点击 Save & Restart。重启后,选择使用刚才配置的第三方推理方式进入 Claude。
不要添加 /v1
Gateway base URL 请填写 https://asterflow.ai,末尾不要添加 /v1。
5. 验证连接
打开 Code 页面,新建一个任务并发送 hello。收到正常回复后,可在 AsterFlow 的使用日志中确认请求记录。如果现有会话仍使用旧配置,请完全退出 Claude 后重新打开。
连接测试通过或保存成功后,仍需完成上述真实请求验证。
macOS 桌面端图文指引
1. 安装 Claude 桌面版
打开 Claude 官方下载页面,下载 macOS 版本的 .dmg 安装文件。
打开安装文件,将 Claude.app 拖入 Applications(应用程序) 文件夹,再从“应用程序”打开 Claude。若出现 Get started,点击后进入初始页面。
配置第三方推理网关无需先登录或注册 Claude 账号。
2. 获取 AsterFlow 密钥
打开 AsterFlow 令牌页面,创建或复制一个可用的 API Key。
3. 打开第三方推理设置
点击 Claude 窗口,让 Claude 成为当前应用。接下来使用的是屏幕顶部的 macOS 菜单栏。
如果还没有 Developer 菜单,依次选择 Help → Troubleshooting → Enable Developer Mode...,按提示启用开发者模式;如应用重启,重新回到 Claude。
然后在顶部菜单栏选择 Developer → Configure Third-Party Inference...。
4. 填写 AsterFlow 配置
打开 Connection 页面,选择 Gateway。下图为 Claude 官方的 macOS 配置窗口示例:
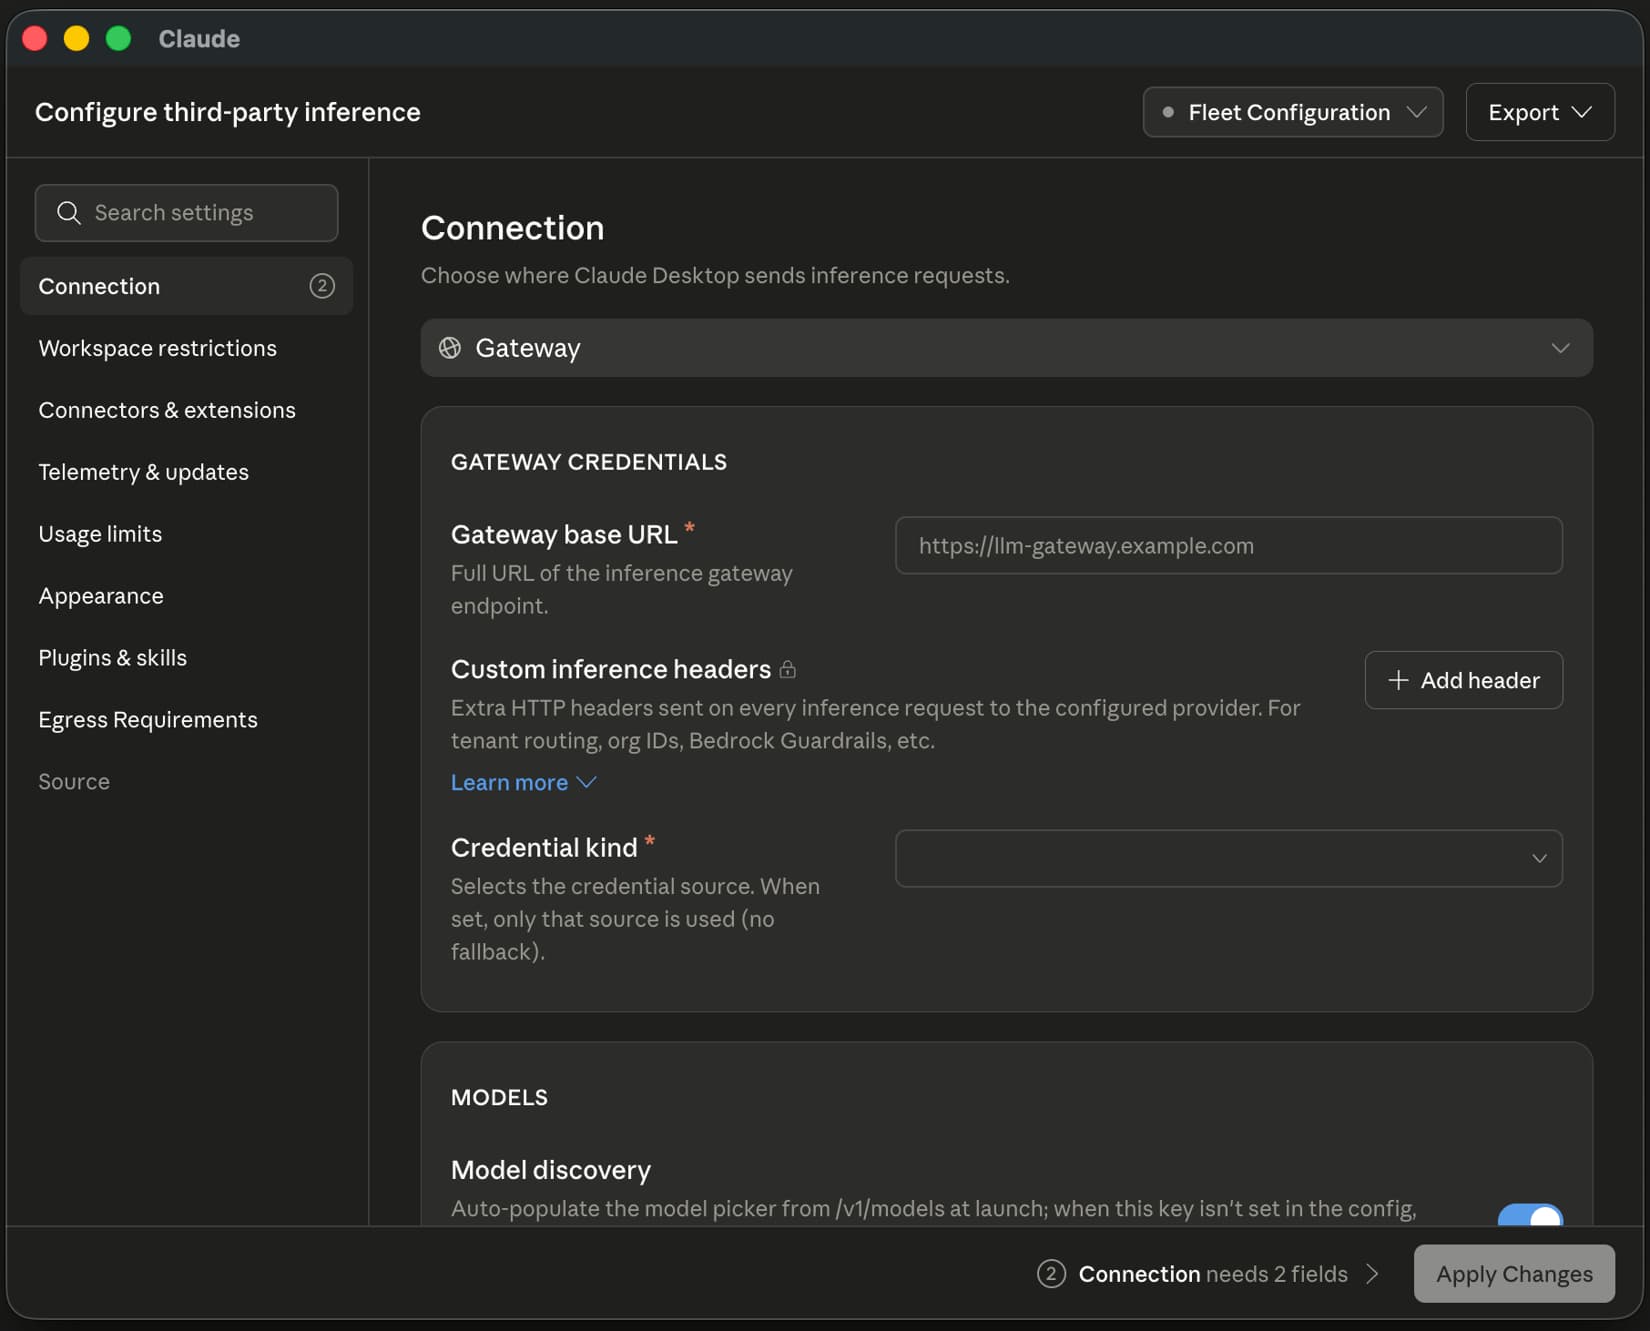
图片来源:Claude 官方文档。图中的 https://llm-gateway.example.com 是示例地址,请按下表填写 AsterFlow 的实际配置。
| 配置项 | 填写内容 |
|---|---|
| Connection / Inference provider | Gateway |
| Credential kind | Static API key |
| Gateway base URL | https://asterflow.ai |
| Gateway API key | 粘贴你的 AsterFlow API Key |
| Gateway auth scheme | bearer |
选择 Static API key 后,填写密钥和认证方式。点击 Test connection,测试通过后点击 Apply Changes,再按提示点击 Save & Restart。
不要添加 /v1
Gateway base URL 请填写 https://asterflow.ai,末尾不要添加 /v1。
5. 验证连接
重启后,选择使用刚才配置的第三方推理方式进入 Claude。打开 Code 页面,新建一个任务并发送 hello。
收到正常回复后,在 AsterFlow 的使用日志中确认本次请求记录。连接测试通过或保存成功,不代表已经完成真实请求验证。
如果仍使用旧配置,通过 Claude → Quit Claude(Command + Q)完全退出后重新打开;只关闭窗口不等于退出应用。
参考资料
参考 Claude 官方的 安装说明、应用内配置说明 和 Gateway 配置说明。