
ChatGPT Desktop
Connect Codex in the ChatGPT desktop app on Windows or macOS to AsterFlow.
Scope
This guide configures Codex in the ChatGPT desktop app and also applies to the standalone Codex desktop app. It does not change the network route used by regular ChatGPT conversations.
Windows Desktop Walkthrough
1. Install and launch ChatGPT Desktop once
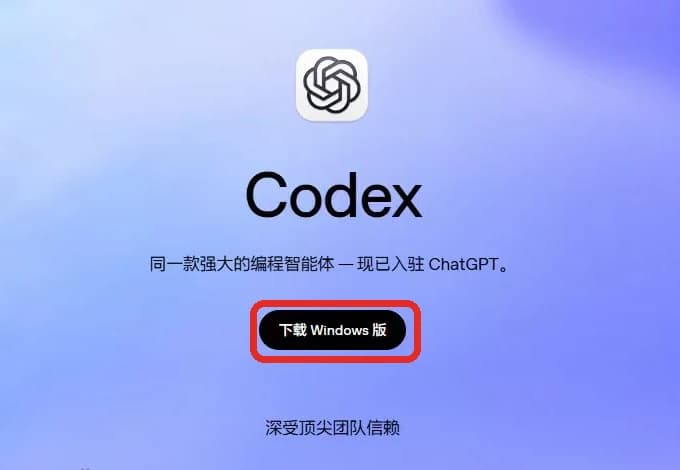
Open the official OpenAI Codex page and select Download for Windows. Microsoft Store opens; wait for ChatGPT to finish downloading and installing.
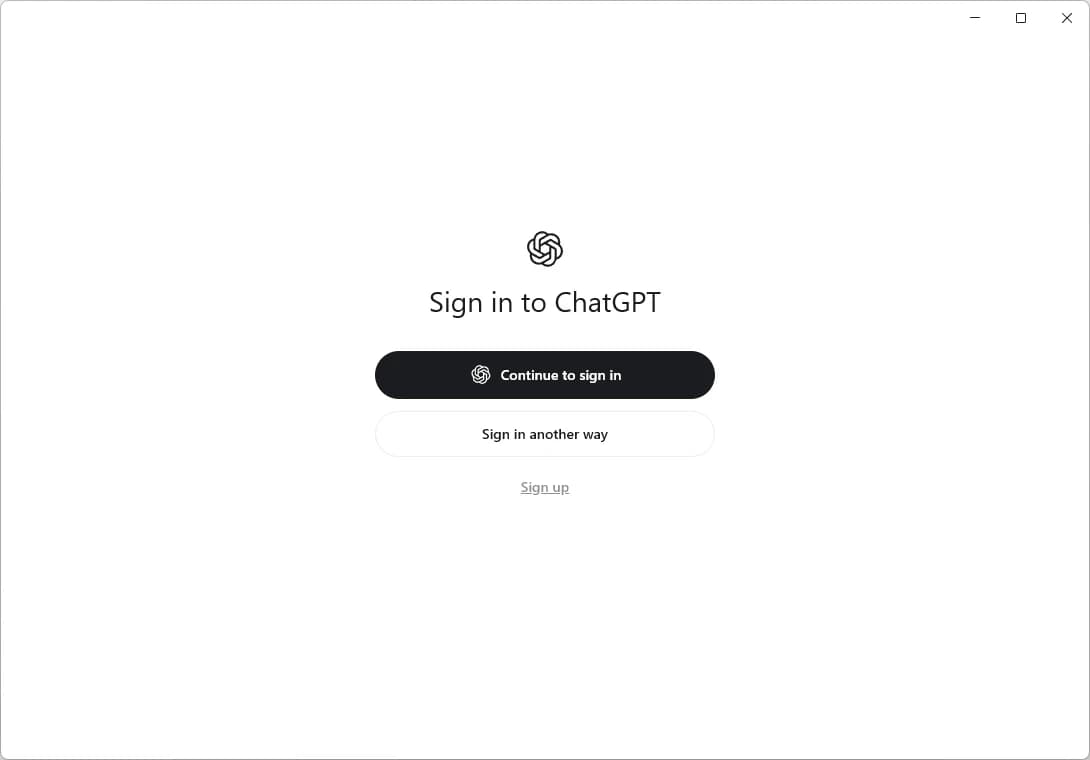
Open ChatGPT Desktop after installation. First-time users normally see Sign in to ChatGPT. You do not need to sign in for this setup; fully quit the app. Users who have signed in before may go directly to the main window and should fully quit the app there as well.
The first launch prepares the Codex configuration. You do not need to find the installation directory or open the .codex folder yourself.
2. Get an AsterFlow key
Open the AsterFlow token page, then create or copy a working API key.
3. Start setup with one command
Open PowerShell, paste the following command, and press Enter. Administrator access is not required.
irm https://docs.asterflow.ai/helper/codex-desktop-setup.ps1 | iex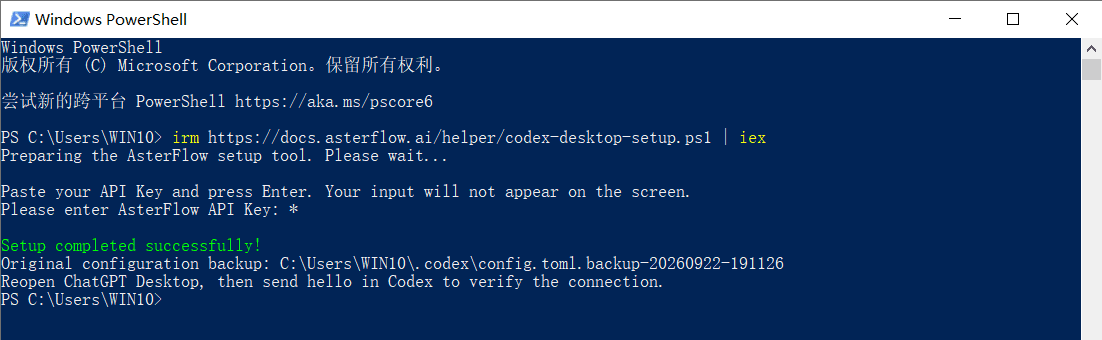
After the command starts:
- When
Please enter AsterFlow API Key:appears, paste the key and press Enter. - The actual key is not displayed. PowerShell may show asterisks (
*) to mask your input; this is expected. - When
Setup completed successfully!and the original configuration backup path appear, reopen ChatGPT Desktop.
The command downloads and verifies the setup tool, then runs it in the background. It finds the existing config.toml, creates a backup, stores the key, and adds the AsterFlow provider. The key is not placed in command-line arguments or the configuration file. Existing model, plugin, MCP, project, and desktop settings are preserved.
If the tool cannot find config.toml, launch ChatGPT again, wait for the main window to finish loading, fully quit it, and retry.
Keep Windows security enabled
The background setup tool is not yet Windows code-signed, but the launcher verifies the downloaded file's SHA-256. If Windows or an organization policy blocks the tool, stop and contact your administrator or AsterFlow support. Do not disable Windows security features to run it.
4. Verify the connection
Open Codex, create a new task, and send hello. After you receive a response, confirm the request in the AsterFlow usage logs. If an existing session still uses the old settings, fully quit and reopen ChatGPT.
macOS Desktop Guide
1. Download and open the desktop app
Open the official OpenAI desktop app page and select the download for your Mac. For Apple Silicon (M-series chips), choose Download for macOS (Apple Silicon). Check the official page for current system requirements.
Open the downloaded .dmg, follow its instructions to drag the app into Applications, and open it from there. If you already have ChatGPT with Codex, or the standalone Codex desktop app, you can use that installation.
Wait for the app to initialize, then press Command + Q to quit completely. Closing the window does not quit the app. Exit any running Codex CLI sessions as well.
2. Get an AsterFlow key
Open the AsterFlow token page, then create or copy a working API key.
3. Start setup with one command
Requires Apple Silicon (M-series chips) and macOS 13 or later. Fully quit ChatGPT / Codex Desktop and Codex CLI, open Terminal, paste this command, and press Enter. Administrator access is not required; do not use sudo.
curl -fsSL https://docs.asterflow.ai/helper/codex-desktop-setup-macos.sh | /bin/bashThe command downloads and verifies the setup tool automatically. No manual download, extraction, or installation is required.
- When
Please enter AsterFlow API Key:appears, paste your key and press Enter. Nothing is displayed, including asterisks; this is expected. - Follow any macOS Keychain access prompt. Canceling authorization stops setup.
- When the tool reports that the key was verified and the configuration was saved, note the backup path and reopen ChatGPT / Codex.
The tool checks access to the AsterFlow model list before backing up and updating the user configuration. It stores the key in the local system Keychain and preserves existing model, plugin, MCP, and project settings. The default configuration is ~/.codex/config.toml; if you set CODEX_HOME, make sure it matches the directory used by the desktop app.
Keep macOS security enabled
The tool does not yet have Apple Developer ID signing or notarization. The script checks SHA-256, signature integrity, and macOS security policy. If macOS rejects the package, setup stops without changing the configuration. Contact AsterFlow support or use the manual steps below; do not disable system security.
If config.toml is missing, launch the desktop app once, wait for initialization, and quit completely before retrying. If another authentication method is already configured, keep your existing configuration and contact support instead of adding duplicate fields or removing credentials.
4. Verify the connection
Open Codex, create a new local task, select a model your token can access, and send hello. After receiving a normal response, confirm the matching request, model, and usage in AsterFlow usage logs. Key validation and saved settings alone do not confirm a working model connection.
To restore the previous configuration, quit the app and restore the backup shown by the tool as config.toml. Do not share keys, configuration files, or backups.
Manual configuration steps
1. Back up and open the configuration
Press Command + Space, search for Terminal, open it, and paste this command:
(
  set -e
  umask 077
  config_dir="${CODEX_HOME:-$HOME/.codex}"
  mkdir -p "$config_dir"
  if [ -f "$config_dir/config.toml" ]; then
    cp -n "$config_dir/config.toml" "$config_dir/config.toml.backup-$(date +%Y%m%d-%H%M%S)"
  fi
  touch "$config_dir/config.toml"
  chmod 600 "$config_dir/config.toml"
  open -a TextEdit "$config_dir/config.toml"
)
TextEdit opens your user configuration, normally at ~/.codex/config.toml. Any existing file is first backed up as config.toml.backup-date-time in the same folder. If you configured a separate CODEX_HOME for the desktop app, use its actual configuration directory; Terminal and the desktop app may have different environment variables.
2. Add the AsterFlow settings
Ensure TextEdit uses plain text, and disable Edit → Substitutions → Smart Quotes before editing. Use straight double quotes (") in the configuration.
Keep the existing file contents. Add this line at the top, before any [section] headers. If model_provider already exists, update its value instead of adding a duplicate.
model_provider = "asterflow"Append the following section at the end of the file, replacing YOUR_ASTERFLOW_API_KEY with your key. If [model_providers.asterflow] already exists, edit that section in place.
[model_providers.asterflow]
name = "AsterFlow"
base_url = "https://asterflow.ai/v1"
wire_api = "responses"
experimental_bearer_token = "YOUR_ASTERFLOW_API_KEY"
Preserve existing model, model_reasoning_effort, plugin, MCP, and project settings. Do not also keep env_key, requires_openai_auth, or [model_providers.asterflow.auth] for this provider; those belong to other authentication methods.
The key is stored in your local configuration
This manual method stores the key as plain text in config.toml. Do not share or upload this file or its backups. OpenAI normally recommends environment variables; a direct key is used here because apps launched from the Dock or Finder may not inherit Terminal environment variables.
3. Save and reopen the app
Press Command + S to save. Keep the filename config.toml, without a .txt extension.
Reopen ChatGPT / Codex from Applications, open Codex, create a new local task, and select a model your AsterFlow token can access. The provider address should be https://asterflow.ai/v1.
4. Verify the connection
Send hello. After receiving a normal response, confirm the matching request, model, and usage in the AsterFlow usage logs. Saving the configuration or opening the app alone does not confirm a working connection.
If something goes wrong:
401 / Invalid token: check that the key is complete, valid, and has the required permissions.- Missing
ASTERFLOW_API_KEY: check whetherenv_keyremains in the AsterFlow provider section. - Configuration syntax error: check for duplicate keys or sections, smart quotes, and a
.txtextension. - Settings not taking effect: confirm the configuration directory, fully quit with
Command + Q, reopen, and create a new task. Regular ChatGPT chats do not use this configuration. - Unavailable model or
No available channel: check the models allowed by your token or contact AsterFlow support. Never send your key.
To restore the previous configuration, quit the app and restore the backup from manual step 1 as config.toml.
References
See the OpenAI desktop app guide, configuration basics, and configuration reference.